One day a biker friend of mine asked me to give him a solution for charging his phone from the bike's dynamo while on longer trips. Sounded pretty simple and a nice challenge for a low cost solution to be found.
His bike has a Shimano HB-NX70 dynamo that's nothing more than a alternating current generator rated for 6V and 3W. That voltage rating is an estimative figure though as it all depends on the wheel's speed so you can have much less when cycling slow or much more when speeding.
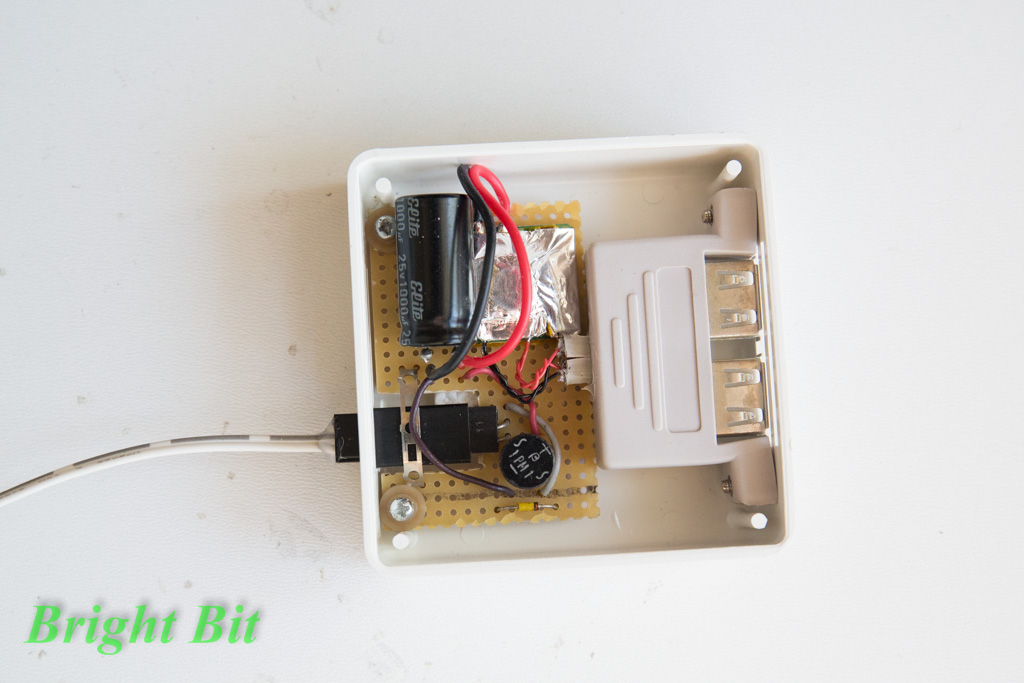
That being said, the solution? Whatever I had laying around as left overs or in the junkbox. A small plastic case, small piece of prototype PCB, a PC bracket with two USB connectors, a DC/DC converter (a.k.a. BEC in RC hobby world), and some discrete components: a rectifier diode bridge, a big fat filtering capacitor and a little protection with a zenner diode.
On the bike's original electrical instalation, the dynamo powers a head light together with a tail light. I had to open the head light anyway because it wasn't working so I pulled the AC from there.
The BEC starts operating at 6Vdc and goes all the way up to 23Vdc. I put it all together in a hurry and didn't give the time to pull up a schematic or do some multimeter work on the dynamo's output and how all things work together.
All I can say is that when the time came and we gave the charger a test spin, it worked, charging a phone with 600mA which is decent enough.
Showing posts with label biking. Show all posts
22 April, 2015
28 November, 2012
Bicycle Handlebar Mount Holder review
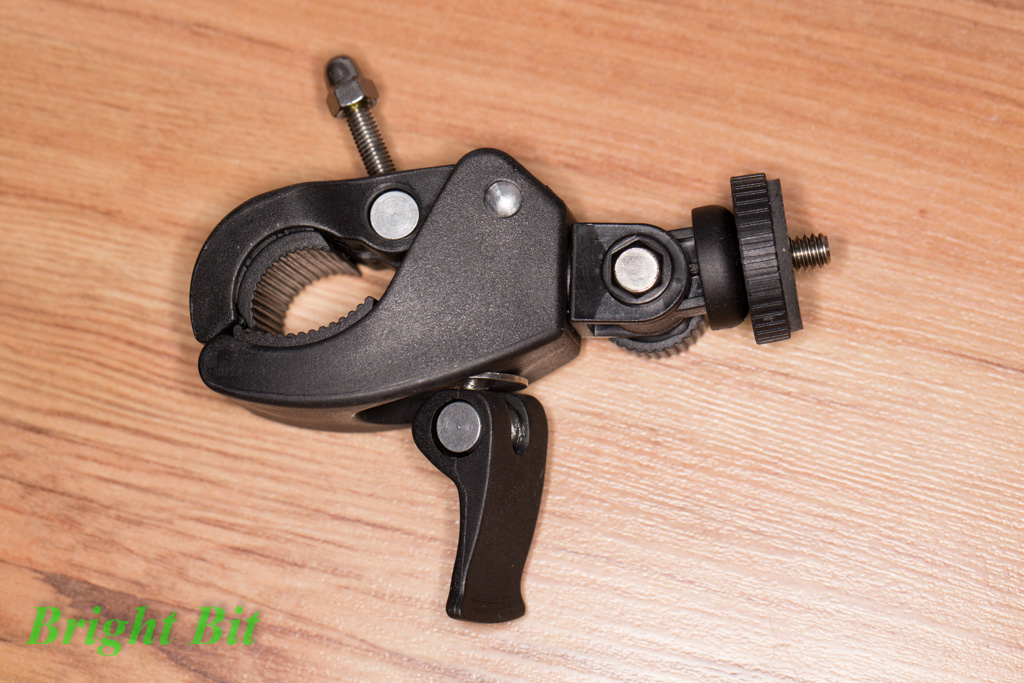
Taking the time to talk again a little bit about the cheap little things one can find over ebay. Got this gizmo for 5$ with free shipping from China all the way to Europe.
It states to be a clamp for bike handlebar mounting of a photo digital camera but I'd
think more at something like a lightweight GoPro
, ContourROAM
or these type of action camers. Anyway, my real interest for this thing was as a studio clamp for holding flashes or other accessories.
The jaws are padded with rubber for extra grip and can open wide enough to clamp even on my Giottos MT8350
As I've said, I've done some testing on my Giottos MT8350 as a support and a Canon 580EX II as a payload. It's doable without much effort even horizontally with the flash extended but it's obvious the mounting plate junction is under excessive effort for it's capability.

In the end, it's 5$ that weren't spent for nothing, I have a clamp that works if taken to appropriate use but it must not be mistaken with the whole different world of metal clamps like the ones from Manfrotto or even the way cheaper CoolLCD's Super Clamps.
26 November, 2012
Crankbrothers PowerPump alloy failure
I love things well done and I must say this pump was and still is a very well done thing, almost.. It's almost because like any thing human does it has it's flaws. But enough talking, lets get to the real stuff
We're talking here about the Crack Brothers Power Alloy Bicycle Pump, a metal alloy bicycle pump with two heads that fit shrader (auto) and presta valves, dual piston design for high volume or high pressure output and a pressure gauge that tops at 160psi/11bar end scale. It's also light at around 200g (case included) and small with about 24cm/9.5inches long.
Tried my own blow out view just to see how complex it really is and I must say I was impressed as it showed to be composed of quite of lot of bits and pieces. I must mention that it's not even blown all the way as there was more to be taken apart. The head assembly is the interesting part. Pressure comes through a center canal that is tapped by the pressure indicator. In the end there's another tap surrounded by a rubber gasket that slides between two red plastic adapters for the individual heads.
While most bike pumps do offer dual valve support by using a single output head with reversible end piece, the guys at Crank Brothers went their own path with this dual head design. Can't say I see any benefit from this as this adds volume, weight and complexity to what could have else been an even better product. To make it worse, this very own feature was the cause of the failure. You can also blame it on user error but when using presta valves it's no way telling how deep is deep enough when you connect the pump with the valve head. Since I used it quite a lot on presta valves, my smart little pump failed about a year after purchase. When opened it turned out that the end of the presta valve from the bike chew up a groove into the rubber gasket from the pump head chamber during twisting in and out the head to pressurize the connection between pump and valve. That gasket is what seals the transfer of pressure between then pump piston and the head assembly. As a quick fix and another year delay I mounted the gasket upside down. Then it failed again and it was time to search for another gasket and sadly the manufacturer doesn't provide any spare parts for this pump. After a lot of search I finally improvised something but the material was softer and it didn't last long till it failed again.
Looking back at all this trouble I guess I could have taken the time to do some trials with mounting the pump on a presta valve without touching the gasket but it's not that easy to apply when you're on the run in a trip or you lend the pump to a friend. Funny thing is that on the product cardboard it stated "warranty: lifetime" :) not that I can benefit of it here in Romania where the reseller only covers 1 year warranty long gone. I still love my pump and hope to find again somewhere another replacement for that darn gasket but in the meantime I had to buy a second pump.
I chose a POINT GM-61 that's quite long, heavy and cumbersome but promises to be more reliable, hope the hose won't be a failure cause ;))
We're talking here about the Crack Brothers Power Alloy Bicycle Pump, a metal alloy bicycle pump with two heads that fit shrader (auto) and presta valves, dual piston design for high volume or high pressure output and a pressure gauge that tops at 160psi/11bar end scale. It's also light at around 200g (case included) and small with about 24cm/9.5inches long.
Tried my own blow out view just to see how complex it really is and I must say I was impressed as it showed to be composed of quite of lot of bits and pieces. I must mention that it's not even blown all the way as there was more to be taken apart. The head assembly is the interesting part. Pressure comes through a center canal that is tapped by the pressure indicator. In the end there's another tap surrounded by a rubber gasket that slides between two red plastic adapters for the individual heads.
While most bike pumps do offer dual valve support by using a single output head with reversible end piece, the guys at Crank Brothers went their own path with this dual head design. Can't say I see any benefit from this as this adds volume, weight and complexity to what could have else been an even better product. To make it worse, this very own feature was the cause of the failure. You can also blame it on user error but when using presta valves it's no way telling how deep is deep enough when you connect the pump with the valve head. Since I used it quite a lot on presta valves, my smart little pump failed about a year after purchase. When opened it turned out that the end of the presta valve from the bike chew up a groove into the rubber gasket from the pump head chamber during twisting in and out the head to pressurize the connection between pump and valve. That gasket is what seals the transfer of pressure between then pump piston and the head assembly. As a quick fix and another year delay I mounted the gasket upside down. Then it failed again and it was time to search for another gasket and sadly the manufacturer doesn't provide any spare parts for this pump. After a lot of search I finally improvised something but the material was softer and it didn't last long till it failed again.
Looking back at all this trouble I guess I could have taken the time to do some trials with mounting the pump on a presta valve without touching the gasket but it's not that easy to apply when you're on the run in a trip or you lend the pump to a friend. Funny thing is that on the product cardboard it stated "warranty: lifetime" :) not that I can benefit of it here in Romania where the reseller only covers 1 year warranty long gone. I still love my pump and hope to find again somewhere another replacement for that darn gasket but in the meantime I had to buy a second pump.
I chose a POINT GM-61 that's quite long, heavy and cumbersome but promises to be more reliable, hope the hose won't be a failure cause ;))
Labels:
alloy,
bike pump,
biking,
crankbrothers,
disassembled,
dismantled,
powerpump,
repair,
review
26 October, 2012
Unior 1643/4 (Chain checker for professional use) review
For those who didn't yet figure out, I'm quite a big bicycle addict. Even so, it took me about 3 years before I thought of a technical exam of my good old Univega Alpina SL-3. Things didn't look so good and I had to change the cassette and the chain due to excessive wear on both of them. 3 years for one chain and cassette is quite something considering the amount and type of riding I do.
All this was last summer. This year had some problems with the brakes which turned 4 years without any service so I thought going to a bike center to change the oil. To my surprise I found out that my "new" chain was all trash once more to the point that the cassette needed to be changed also.
Not happy news considering the costs. Conclusion: a chain checker device would have been nice to have to keep a close eye on chain wear and save my cassette at least.
After long searches on the net found there are actually three types of devices for this purpose:
#1 the simplest, cheapest things to get are go/no go gauges that indicate whether or not the chain needs replacement. At best these gizmos have a 2 level test for wear. Being the geek type that I am of course this wouldn't suffice.
#2 measuring tools that actually tell you something more about that wear and give more power to the user for monitoring how things progress in time.
#3 the really geek stuff, measuring tools like #2 but electronic ones this time, with digital displays and all the rest. No need to mention these are the most expensive solution
There's quite a lot of material to read on the subject and I won't duplicate it here. For those into the subject you should start with the good old wiki for the basic stuff: en.wikipedia.org/wiki/Bicycle_chain, Mr. Sheldon for some more in-depth: sheldonbrown.com/chains.html, and google.com for any other questions. Another must read material is found here and talks about more subtle things like wear types and measurement errors.
Getting back to the tool in focus, here we have the Unior 1643/4 which is a chain checker of #2 type. The operating principle is quite straight forward: a metal piece with two vertical pins at both ends, one fixed, one mobile through an off center placement on a labeled rotating disk. The markings on the label are the actual estimated chain wear, between 0 to 1.2 mm or percentage. These markings should be taken with a grain of salt though as a new chain won't read 0 but more likely somewhere around 0.3mm so for accurate readings and decisions a measurement should be taken with every new chain installed. The theory states that a chain is considered worn out and in immediate need of replacement at 1mm stretch across it's whole length. Off course a good practice rule would be to change the chain a little earlier in order to avoid extra wear on the cassette and any unwanted accidents caused by chain slips or breaks.
The package in which it comes is made of cardboard, with not much interesting info on it.
Inside you find the tool wrapped nicely in protective foam. This foam is good to keep for storage keeping as it protects the pins from accidental bending but I found the box to be more conveniently replaced with a zip bag.

All this was last summer. This year had some problems with the brakes which turned 4 years without any service so I thought going to a bike center to change the oil. To my surprise I found out that my "new" chain was all trash once more to the point that the cassette needed to be changed also.
Not happy news considering the costs. Conclusion: a chain checker device would have been nice to have to keep a close eye on chain wear and save my cassette at least.
After long searches on the net found there are actually three types of devices for this purpose:
#1 the simplest, cheapest things to get are go/no go gauges that indicate whether or not the chain needs replacement. At best these gizmos have a 2 level test for wear. Being the geek type that I am of course this wouldn't suffice.
| BBB Chain Checker |
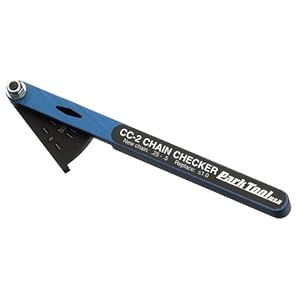
#2 measuring tools that actually tell you something more about that wear and give more power to the user for monitoring how things progress in time.
| Park Tool Chain Checker - CC-2 |
#3 the really geek stuff, measuring tools like #2 but electronic ones this time, with digital displays and all the rest. No need to mention these are the most expensive solution
| KMC Digital Chain Checker |
There's quite a lot of material to read on the subject and I won't duplicate it here. For those into the subject you should start with the good old wiki for the basic stuff: en.wikipedia.org/wiki/Bicycle_chain, Mr. Sheldon for some more in-depth: sheldonbrown.com/chains.html, and google.com for any other questions. Another must read material is found here and talks about more subtle things like wear types and measurement errors.
Getting back to the tool in focus, here we have the Unior 1643/4 which is a chain checker of #2 type. The operating principle is quite straight forward: a metal piece with two vertical pins at both ends, one fixed, one mobile through an off center placement on a labeled rotating disk. The markings on the label are the actual estimated chain wear, between 0 to 1.2 mm or percentage. These markings should be taken with a grain of salt though as a new chain won't read 0 but more likely somewhere around 0.3mm so for accurate readings and decisions a measurement should be taken with every new chain installed. The theory states that a chain is considered worn out and in immediate need of replacement at 1mm stretch across it's whole length. Off course a good practice rule would be to change the chain a little earlier in order to avoid extra wear on the cassette and any unwanted accidents caused by chain slips or breaks.
The package in which it comes is made of cardboard, with not much interesting info on it.
Inside you find the tool wrapped nicely in protective foam. This foam is good to keep for storage keeping as it protects the pins from accidental bending but I found the box to be more conveniently replaced with a zip bag.

Can't think of what more there is to be said about such a simple and straight forward tool. All else I could think of was to actually test that claimed weight on the package which states 168g for the tool while I only got 165g for the tool, foam and package.
03 January, 2011
NiteRider Pro 1400 LED
UPDATE: NiteRider Pro 1400 LED is now replaced by NiteRider Pro 3600 series
Just before the winter holidays started my latest obsession was finally in my hands, muhaha!! Yes, it's the new NiteRider Pro 1400LED bike headlight. Ever since I've seen it while surfing on Amazon I knew I must have it. Awesome specs, good reviews and huge potential to be the ultimate light source for all my outdoor activities: biking, caving, mountaineering and even photography.
So now that the holidays are over and I had the chance to put it to test in all the above mentioned activities, I can sit down a little and tell you all a little about this amazing product.
Starting with unpacking.. As I already knew from the reviews I read on the net the light came in a pouch with everything packed in really tight. So tight that once you get all the parts out, it's hard to put them back together to fit the pouch.
Together with the light I also got the NiteRider Explorer Headband which is needed for using the light as a headlight in mountaineering or if biking without a helmet. The headband is wide enough to handle the 200 gr weight of the light head and offers 4 plastic hooks to aid cable routing to the battery pack. Wearing it I did get a little bothered by the head pressure caused by the light head support pressing. I guess more padding would have been needed but it's something you get used to.
First thing that stroked me after looking at the light head was the fact that it didn't resemble the picture on NiteRider's website. That's because the picture there is actually of a Pro 1200 light system. The difference between the previous Pro 1200 and the current Pro 1400, besides the actual light output, is the presence of two light pipes, one for each reflector. You can see them in the first picture as two small dots. Their purpose is mainly when using the light on a bike, to show you which reflector is turned on. The actual LEDs inside each reflector are Cree XLamp MC-E.
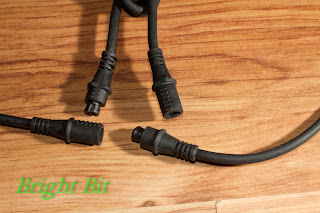
Moving on with the close eye inspection, I checked the cables and the connectors. The cable is very thick and rugged and the connectors well build. They are trapezoidal in shape with a flat matching key, they lock securely and offer quite good water proofness. The only problem that i could see is extra caution needed when connectors are unplugged/plugged in dirt/wet filled environments.
The battery pack is the biggest and heaviest part of the system. That's usually overcame by fixing it on the bike frame or caring it in the backpack, keeping it in a pocket is very uncomfortable. Quality is great, rubber pad for fixed mounting on the bike frame with Velcro straps that can easily be removed if you want to gain weight and space in non-bike activities. I wanted a little more info about battery pack maintenance so here are the producers recommendations:
When charging the battery, it should be done inside at room temperature. The batteries should not be charged below or above certain temperatures. There is a safety circuit that will shut off the charge if it is in such temperatures. For long term storage, it is best to store the battery at about 40% charge. If you are storing the battery for longer than a couple of months, it is best to store it at 50% then, about once every six to eight weeks, fully discharge, fully charge then discharge to about 50% for storage again.
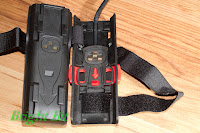
The helmet mount will only work with vented helmets. It uses two straps that need 4 frontal vents in the helmet to get a fix. It won't work on most full helmets or a climbing helmet like my Petzl Elios, since the need of the Explorer Headband.
The handlebar mount is pretty straight forward and easy to use. The material is plastic and not metal like I think i read on a website. Just in case you need it, it comes with an extra rubber pad and an Allen key.
The unit also comes in with what one can call a docking station since it's more than just a charger. Besides the power jack and the battery cradle, the unit also has an mini USB port and a connector to plug in the light head. You do this to program the light head with custom user light patterns. One thing I don't like about the docking station is the empty plastic case feeling. I've seen one unit opened somewhere on the web and it's a certain fact the unit is not the smallest it could be and that is really important when traveling.
The great thing about the power adapter is that it has universal input (100-240V/50-60Hz) so you can use it anywhere and the voltage output is 12V which means you can use a car plug adapter to power the docking station when on the move. A diode or two might be needed to create some voltage drop and get a true 12V output but that's something left to be seen.

Besides all these hardware aspects there's also the software side. The unit has 1 factory program with 3 light levels and 1 flash pattern and 4 user configurable programs with at most 6 light levels combinations and 6 flash patterns per program. That sounds like a lot of fun when you first think of it but at least for me it turned out to be more than I needed so I ended up using only 4 light levels and 3 flash patterns for 3 of the programs.
In the flash window you can even set a custom flash pattern with 0.05-1s on/off time. This pattern is shared between programs so only one given custom flash pattern can be used at any given time on the unit. Also about flash patterns, even though you can set 6 patterns per program, there are only 5 distinct options to choose from so you either use the same pattern on two slots ore never use one slot.. that's a little awkward right? Maybe a second custom flash pattern should be there, right you guys from NiteRider?
One thing worth noting even if it's pretty much irrelevant is that on high speed flash patterns (like 0.05 on with 0.05 off) the light head's on-board controller doesn't keep up the count and lags a little from time to time.
The software that does all these is great but could have been better still. I'm not a fan at all for the applications with custom skins like this one and I don't understand why the Light window layout is one way while the Flash window layout, even though houses the same 6 settings style, is the opposite. Maybe I'm too fastidious..
Mods and tweaks
During prolonged bike tours in the countryside I considered some anti theft measures like replacing the battery pack's Velcro straps with plastic cable ties and replacing the "user friendly" screw and wing nut on the handlebar mount with an Allen head screw and a washer.
When I installed the Universal Handlebar Mount I noticed that the light head fixture wasn't adjustable like the helmet or head mounts. This meant that vertical adjustment of the light head had to be done by unscrewing and then tightening back the whole handlebar mount which is totally uncool. Salvation came from the helmet mount from which I took the light head support and switched it with the one on the handlebar mount. It's not a perfect switch since the systems are a little bit different but it can be done with no intrusive maneuvers in no time.
Official documentation
Prior to getting the real deal, the one thing that really bugged me was that the user manual on the NiteRider's web site didn't work. Hope I'm not breaking any rules but here is the scanned documentation that came with the unit.
Conclusions
As I've said in the beginning, these holidays i had the chance to give the unit a spin in all sort of activities. Used it in the cold, in the warm, when dry, when wet, low beam, high beam.. you name it.
First things first so I'll start with biking. Handlebar mounting wasn't a big thing, finding room for the battery pack was. The frame's down tube was already busy with the water bottle support that housed the AirZound Bike Horn so I had to squeeze the battery pack above it really tight. Since it's winter here I only had the chance for a quick 20 km city and surrounding trip. Light output is definitely enough for every need you can possibly have while riding and it's definitely more than you need within city limits.
The most annoying thing here is that you don't have enough control over the flash output. By default it is 700 lm on the flood reflector and you can't do anything about it. Why use the flood reflector? beats me cause it's definitely not something that you want to do with a 700 lm light source in traffic, where auto drivers freeze into panic when they see it but might just as well stop and beat the hell out of you.
While on the mountain I used the unit as a headlight. I tried using direct connection of the light head to the battery pack with the pack placed in my backpack's top pocket but it was to short so I had to add the extra extension. It put to shame my now discontinued Petzl Myo XP headlight and on paper it's far beyond the Petzl Ultra even though I didn't have the chance to see them side by side. For both biking and mountaineering most of the times I used 150 lm of spot light, adding extra only when needed.
I also had the chance to explore an old mining tunnel which was the only case when I felt flood light was better than spot. Having such a great light in total darkness is a blessing for taking photos as it helps you find subjects to photograph, helps the camera auto-focus and can even be used as main light if no flash is at hand.
One thing that got me a little worried was the fact that while in the tunnel I actually heard the buzz coming from the inverter driving the LED's in the light head. When these switching power supply commutation noises can be heard it usually means somethings shaky inside, a coil or transformer not properly tightened. The noise disappeared once I was out the tunnel and haven't heard it since so it might have been a combination of factors like temperature and moisture (since the unit is not rated completely water proof).
All and all, the most important thing that must be kept in mind when dealing with this unit is the company's motto "Technical Lighting Systems". It is intended for off-rode night bike trips but it's definitely not worth the money if used just for that. You have a lot of light output, battery power and build quality but you loose something in the way whenever you turn sideways from it's main purpose.
Within city limits it's to big and heavy to use, it draws a lot of attention and changing from lighting to flash is not something that can be done easily while riding. That's why I won't give up the old Trelock LS330 which is perfect for the job.
On the mountain is just great on off-track trips to help you find your way into the night. You can spot tracks and signs that are hundred or thousands meters away which sometimes is a real life saver.
Am I happy with the purchase? Definitely yes! Could it be better? Definitely yes! Would I buy it again? I'm not sure..
The handlebar mount is pretty straight forward and easy to use. The material is plastic and not metal like I think i read on a website. Just in case you need it, it comes with an extra rubber pad and an Allen key.
The unit also comes in with what one can call a docking station since it's more than just a charger. Besides the power jack and the battery cradle, the unit also has an mini USB port and a connector to plug in the light head. You do this to program the light head with custom user light patterns. One thing I don't like about the docking station is the empty plastic case feeling. I've seen one unit opened somewhere on the web and it's a certain fact the unit is not the smallest it could be and that is really important when traveling.
The great thing about the power adapter is that it has universal input (100-240V/50-60Hz) so you can use it anywhere and the voltage output is 12V which means you can use a car plug adapter to power the docking station when on the move. A diode or two might be needed to create some voltage drop and get a true 12V output but that's something left to be seen.

Besides all these hardware aspects there's also the software side. The unit has 1 factory program with 3 light levels and 1 flash pattern and 4 user configurable programs with at most 6 light levels combinations and 6 flash patterns per program. That sounds like a lot of fun when you first think of it but at least for me it turned out to be more than I needed so I ended up using only 4 light levels and 3 flash patterns for 3 of the programs.
In the flash window you can even set a custom flash pattern with 0.05-1s on/off time. This pattern is shared between programs so only one given custom flash pattern can be used at any given time on the unit. Also about flash patterns, even though you can set 6 patterns per program, there are only 5 distinct options to choose from so you either use the same pattern on two slots ore never use one slot.. that's a little awkward right? Maybe a second custom flash pattern should be there, right you guys from NiteRider?
One thing worth noting even if it's pretty much irrelevant is that on high speed flash patterns (like 0.05 on with 0.05 off) the light head's on-board controller doesn't keep up the count and lags a little from time to time.
The software that does all these is great but could have been better still. I'm not a fan at all for the applications with custom skins like this one and I don't understand why the Light window layout is one way while the Flash window layout, even though houses the same 6 settings style, is the opposite. Maybe I'm too fastidious..
Mods and tweaks
During prolonged bike tours in the countryside I considered some anti theft measures like replacing the battery pack's Velcro straps with plastic cable ties and replacing the "user friendly" screw and wing nut on the handlebar mount with an Allen head screw and a washer.
When I installed the Universal Handlebar Mount I noticed that the light head fixture wasn't adjustable like the helmet or head mounts. This meant that vertical adjustment of the light head had to be done by unscrewing and then tightening back the whole handlebar mount which is totally uncool. Salvation came from the helmet mount from which I took the light head support and switched it with the one on the handlebar mount. It's not a perfect switch since the systems are a little bit different but it can be done with no intrusive maneuvers in no time.
Official documentation
Prior to getting the real deal, the one thing that really bugged me was that the user manual on the NiteRider's web site didn't work. Hope I'm not breaking any rules but here is the scanned documentation that came with the unit.
Conclusions
As I've said in the beginning, these holidays i had the chance to give the unit a spin in all sort of activities. Used it in the cold, in the warm, when dry, when wet, low beam, high beam.. you name it.
First things first so I'll start with biking. Handlebar mounting wasn't a big thing, finding room for the battery pack was. The frame's down tube was already busy with the water bottle support that housed the AirZound Bike Horn so I had to squeeze the battery pack above it really tight. Since it's winter here I only had the chance for a quick 20 km city and surrounding trip. Light output is definitely enough for every need you can possibly have while riding and it's definitely more than you need within city limits.
The most annoying thing here is that you don't have enough control over the flash output. By default it is 700 lm on the flood reflector and you can't do anything about it. Why use the flood reflector? beats me cause it's definitely not something that you want to do with a 700 lm light source in traffic, where auto drivers freeze into panic when they see it but might just as well stop and beat the hell out of you.
While on the mountain I used the unit as a headlight. I tried using direct connection of the light head to the battery pack with the pack placed in my backpack's top pocket but it was to short so I had to add the extra extension. It put to shame my now discontinued Petzl Myo XP headlight and on paper it's far beyond the Petzl Ultra even though I didn't have the chance to see them side by side. For both biking and mountaineering most of the times I used 150 lm of spot light, adding extra only when needed.
I also had the chance to explore an old mining tunnel which was the only case when I felt flood light was better than spot. Having such a great light in total darkness is a blessing for taking photos as it helps you find subjects to photograph, helps the camera auto-focus and can even be used as main light if no flash is at hand.
One thing that got me a little worried was the fact that while in the tunnel I actually heard the buzz coming from the inverter driving the LED's in the light head. When these switching power supply commutation noises can be heard it usually means somethings shaky inside, a coil or transformer not properly tightened. The noise disappeared once I was out the tunnel and haven't heard it since so it might have been a combination of factors like temperature and moisture (since the unit is not rated completely water proof).
All and all, the most important thing that must be kept in mind when dealing with this unit is the company's motto "Technical Lighting Systems". It is intended for off-rode night bike trips but it's definitely not worth the money if used just for that. You have a lot of light output, battery power and build quality but you loose something in the way whenever you turn sideways from it's main purpose.
Within city limits it's to big and heavy to use, it draws a lot of attention and changing from lighting to flash is not something that can be done easily while riding. That's why I won't give up the old Trelock LS330 which is perfect for the job.
On the mountain is just great on off-track trips to help you find your way into the night. You can spot tracks and signs that are hundred or thousands meters away which sometimes is a real life saver.
Am I happy with the purchase? Definitely yes! Could it be better? Definitely yes! Would I buy it again? I'm not sure..
Labels:
biking,
mountaineering,
NiteRider,
Pro 1400LED,
review
30 November, 2010
AirZound Bike Horn
Delta Airzound Bike Horn
Thought of sharing some thoughts on things i find awesome so now i start with AirZound.
Many biblicists don't even know it exists, i only found it by chance while surfing around Amazon but i easily saw it's potential in a heavy-messy traffic like the one in Bucharest in particular and Romania in general. It's easy to set up, eco-friendly, loud like nothing else on the market. "Cons": u need to get used to it - pressing it gently enough not to scare pedestrians and the biggest bummer: it tends to wake up killer instincts in types of driver that find offensive a bike horn that's louder than most car horns.
It comes in many color variations and claims are about different versions but i couldn't find the actual difference between these so called versions.
No need to make a strong point on how useful this lil bugger is since there are a lot of infos out there already, just google it.
Subscribe to:
Posts (Atom)